
One thing that is known is FL Studio workflow. But there are some features you might be losing and that can further accelerate that workflow.
Let's start with the Channel Rack. If you press Alt + g, you can group the selected channels under a name.
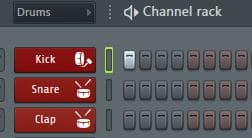
You will notice that at the top of the Channel Rack, there is a drop down menu that says “ALL”. When you create a group and name it, you can access them through this menu. This can help you quickly jump between your batteries., instruments, synthesizers, low, etc. Another option would be to simply color these groups for quick viewing.. You can select the channels you want to color and click the arrow at the top right of the Channel Rack and choose “Selected Color”. In addition, if you click with the middle mouse button on a selected channel, the option to name will appear, Color and set an icon for greater viewing.
Nevertheless, sometimes you just have too many channels and you just want to focus on specific channels within a group. Alt + z will minimize any selected channel, while leaving the other channels full size.
You can see here, the purple channels I selected have been compressed and the remaining blue channels have been left alone for me to access. You can still access these compressed channels by clicking on them to access Channel Settings, or right-clicking to restore them to full size on the Channel Rack.
I know that I will personally test many different samples and VSTi in one project, leaving me with numerous channels that are no longer relevant to the project. If you go to Tools from the main menu and then to Macros, you will see the option “Purge Unused Audio Clips”. This will remove any audio that you have not placed in the playlist or added any steps in the step sequencer. You will also see “Select unused channels”. After selecting unused channels, press ALT + delete to remove these channels.
With the FL Studio update 20.1, we received a new function that allows us to drag and drop audio and instruments directly on the names of the tracks in the playlist. This will automatically create a playlist track, a new channel and link it to an insert in the mixer. Before, you had to create each of them one by one by assigning names, color and link Channel to Mixer manually.
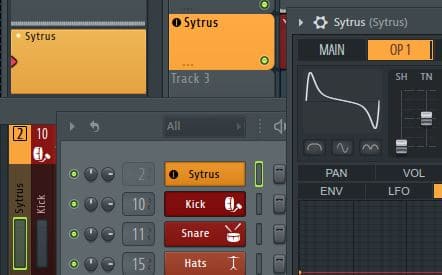
The playlist selector is a quick way to access your patterns within the playlist. You can right click on any of the patterns and split the channels to create individual patterns for each channel for quick distribution in the Playlist.. Thereafter, highlight all patterns in the pattern selector by selecting the first and last pattern while holding the Shift key and dragging the first pattern to the first track in the playlist. The patterns will be named after your channels and the tracks in the playlist will have the same names and colors as those patterns.. You can also press F4 to rename or change the color of any of these patterns.
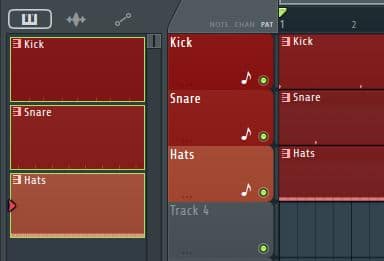
Another convenient option within Playlist and Piano Roll is the mini preview. This will be located at the top of the Playlist or Piano Roll. Select the drop down menu for each section and go to “See” and select “Mini Playlist” o “Mini Piano Roll”. This will allow you to quickly jump to any section of the Playlist or Piano Roll by dragging the highlighted box or clicking on the area you would like to focus on..
One thing I like to keep disabled in the Miscellaneous settings under Options on the General tab is “Autoname Channels”. I personally use my own FL Studio template, I've already named my channels. That way, when loading a sample into the channel “Kick”, will keep the name “Kick” instead of changing it to the random sample name. This helps to divide the channels and add these patterns to the playlist because the names and colors will always stay the same in every project.. My drums will be called “Kicks” and my pianos will be called “Piano”, always. I already have my template setup to have each of these linked to the Mixer and color coordinated for quick visual access.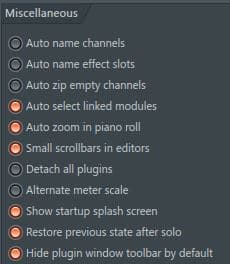
I also have “Auto Select Linked Modules” activated, allowing me to click on a channel and automatically highlight it when I go to the Mixer. Another option that might interest you is “Detach All Plugins”. If you have multiple screens, this will allow you to drag your plugins to any screen. You can also separate the Mixer, Channel Rack, Piano Roll or Playlist to move it to a new screen from each of its drop-down menus.
By last, but not less important, the Mixer has a great option to quickly access your effects. If you change in sight “Extra Large”, you will see the names of each plugin at the bottom of each insert found. Having an overview of all plugins will save more clicks and more time, instead of clicking on each individual insert to see, add or remove plugins.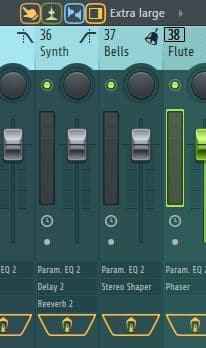
Hopefully, These quick tips will speed up your workflow by giving you better overall organization in your projects. For more tips and tricks on FL Studio and Music Production, check out the youtube channel (In English), Inflightmuzik .




Leave A Comment